Showing posts with label iPad Tips and Tricks. Show all posts

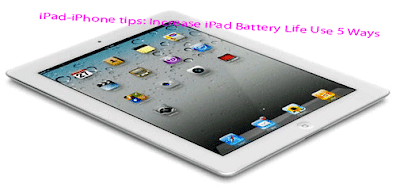
iPad-iPhone tips: Increase iPad Battery Life Use 5 Ways

I have an iPad 2 and I realized over the last few months that my battery was draining faster than I would have liked. I was determined to increase the battery life and I was suprisingly successful. At first I thought the battery was just getting old and could not hold the charge as long, but I had been so particular with charging the iPad that luckily that wasn’t the case.

Before I started this endeavor, I noticed that the iPad would last about 3 to 4 days with my regular use, which was about 30 mins to an hour a day. After I implemented some changes, I was able to get the iPad to last almost 7 to 8 days without having to charge it! And a lot of them were very easy fixes that just never occurred to me before. In this article, I’ll mention the 5 tweaks that increased the battery life of my iPad. If you have others not mentioned here, let us know in the comments.
iPad-iPhone tips: Increase iPad Battery Life Use 5 Ways

Method 1 – Charge When Low Battery

One of the main reasons why my iPad battery has lasted two years is because I still follow the charge only when the battery is really low rule. Yes there are some that say that doesn’t matter as much now, etc, etc, but whatever. I still do it and it seems to work. For example, I usually wait till the iPad is below 5% and then I start charging it.

Also, I do a couple of other things. Firstly, I make sure that I let it charge all the way to 100% without disconnecting it. A battery gets worn down by charge cycles, so if you stop in-between and then charge it again and then stop, over and over, the life of the battery will decrease.

Lastly, I try my best to disconnect it immediately after it hits 100%. The iPad has some mechanism to let the device run on battery and then re-charge when it hits 100% and you keep it connected to the power source. It’s supposed to make the battery last longer, but the fact that it keeps having to do that just means you’re wearing the battery down more. If you can disconnect it ASAP after a full charge that is best.

Method 2 – Disable Lock Screen Notifications

The next major tweak that made a whole lot of difference was disabling notifications on the lock screen. Basically, whenever you get a notification from any app (and I got a whole lot because I have 100+ apps installed), it will appear on the lock screen and they display will turn on in order to show it. The display comes on for a short time, but I realized that this was happening all the time. Every 15 to 20 minutes, my iPad would turn on to display a Facebook notification, iMessage notification, new magazine notification or something else.

All that time the display was on for showing notifications, the battery was being slowly eaten up. I quickly realized that I had to just turn off notifications on the lock screen and no more constant screen light-ups.


iPad-iPhone tips: Increase iPad Battery Life Use 5 Ways

You’ll have to go through each app under Notifications, but it’s well worth the time. You don’t have to turn off notifications completely, just make sure that you turn off View in Lock Screen for anything you don’t feel is very important. I switched off notifications on the lock screen for pretty much everything except a few apps I wanted to get visual alerts for.

What’s nice is that once you unlock the iPad, you’ll then see all the notifications appear in the banner at the top. Make sure you also turn on Banners instead of Alerts. Recently, I also turned mine off for iMessage because I realized with the new unified iMessage in iOS 6, my iPad would keep turning on every time I got a new iMessage on my iPhone. If I had an extended conversation, the iPad would light up the whole time. Definitely not necessary.

Method 3 – Auto-Lock

If you go to Settings, General, and Auto-Lock, you should set this value to the lowest possible, which is 2 minutes.


iPad-iPhone tips: Increase iPad Battery Life Use 5 Ways

Unless you really need the display on for longer, 2 minutes without using it is more than enough. After that, you want it to automatically turn off. The less the screen is on when you’re not using it, the longer your iPad battery will last.

Method 4 – Turn Off Cellular Data

My iPad is Wifi+3G and the 3G used to always be on. I realized this was pretty useless since I only used it when I left the house. So maybe a few times a week, I would be using 3G, otherwise it was always connected to WiFi.

For the new iPad, you’re talking 4G, which probably eats up even more battery. I just turn off cellular data until I actually need it. Just go to Settings and tap on Cellular Data and switch it to Off. 

iPad-iPhone tips: Increase iPad Battery Life Use 5 Ways


Method 5 – Bluetooth

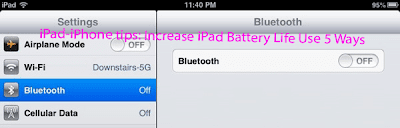
Lastly, I also disabled Bluetooth as I didn’t use this feature all the time either. Whenever I needed to connect my bluetooth headset, I would just go in and turn it back on. After I’m done, I turn if back off. It saves quite a bit of battery if you can be disciplined about it and turn it off when you don’t need it.


iPad-iPhone tips: Increase iPad Battery Life Use 5 Ways


Bonus Method – Do Not Disturb

if you recently updated to iOS 6, then you probably heard of Do Not Disturb. It’s a new feature that will silence all FaceTime calls and any alerts. This is useful if you don’t feel like doing Method 2 mentioned above. Then you can just leave everything and turn on Do Not Disturb for the portion of the day you don’t use the iPad.

If you go to Settings, first turn on Do Not Disturb. After that, tap on Notifications and turn Scheduled to On. Then choose the time you want to enable do not disturb. You can also allow FaceTime calls from favorites if you like or disable it. They even have a feature so that if you get a repeated FaceTime call within three minutes, it’ll ring.


iPad-iPhone tips: Increase iPad Battery Life Use 5 Ways

That’s about it! Using these methods, I was able to significantly increase the battery life of my iPad. If you do something different than what I mentioned here, post it in the comments. Enjoy!


"iPad-iPhone tips: Increase iPad Battery Life Use 5 Ways "


Reference : online-tech-tips.com

iPad and iPhone Tips: Remotely View Webcam on iPad or iPhone Apps

I have a 2 year old child and I also happen to have a computer in pretty much every room in my house. When I need to do something in another part of the house, it’s a real pain having to stop what I’m doing and go check to make sure my daughter is not about to dive off the bed. Once I realized I had a webcam already in every room of my house because of the laptops, I figured there had to be an iPad/iPhone app that would let me wirelessly stream a live webcam feed.

Actually, there ended up being a lot of apps! Too many to write about here. What I also realized is that most of them don’t work very well. After going through about 6 or 7 apps, I ended up sticking with 3 apps that work pretty well. Each has it’s own advantages and disadvantages. In this article, I’ll go through the three apps I tested and verified that work well in streaming a live feed of your webcam to your iPad or iPhone over WiFi. I didn’t test the whole 3G/4G remote viewing capabilities because that doesn’t seem like it would work well in any app and I didn’t need that feature.

iPad and iPhone Tips: Remotely View Webcam on iPad or iPhone Apps


iCam

iPad and iPhone Tips: Remotely View Webcam on iPad or iPhone Apps

The first app that I found when doing a generic search was iCam for $4.99. It seems to be the most popular and has the highest ratings in the AppStore. It’s pretty simple to setup. Just install the Windows or Mac software and install the app on your iPad or iPhone. The interface for the Windows software looks like this:

iPad and iPhone Tips: Remotely View Webcam on iPad or iPhone Apps

You can add a USB, Firewire or built-in camera or you can click on the Ethernet/Wi-Fi tab and add an IP camera also if you like. Just give your camera a iCam Login and iCam password and click the Start button. That’s it! Now go to the app on your iPhone or iPad and it will automatically find the source camera as long as it’s on the same network. The iPad version of the app is also designed to use the bigger screen real estate, so that’s a plus.

Overall, the process was easy to setup, but I was not happy with the quality of the video. For some reason, the video was very choppy and also pixelated. The program has a slider bar that lets you move it from Better Frame Rate to Better Image Quality, but neither one worked too well. When I moved it to better frame rate, the video was delayed by several seconds and was very grainy. When I moved it to better quality, the image got better and the delay became even worse!

I thought it had something to do with the computer or my Wi-Fi network, but when I installed the other two apps I am about to mention, the video quality was much better and the delay was usually under a second. I still recommend this app because it’s very highly rated and it could have just been some issue with my setup.


AirCam

iPad and iPhone Tips: Remotely View Webcam on iPad or iPhone Apps

AirCam was probably my favorite out of all the three apps. It worked well, had only a slight lag and the quality of the video was pretty good, especially for a cheap built-in webcam on my 3 year old laptop.

iPad and iPhone Tips: Remotely View Webcam on iPad or iPhone Apps

AirCam also lets you add IP cameras, so that is another plus. If you want, you can also remotely access it, but that requires extra configuration of your router, etc, which I didn’t do.

iPad and iPhone Tips: Remotely View Webcam on iPad or iPhone Apps


If you click on Options, you can enable night vision, configure remote access, setup the listening port, setup recording, motion detection, email notifications and more. The program has quite a few options, including the ability to choose your resolution, which really made a big difference. One downside is the iPad/iPhone app. It’s a little unpolished in the sense that when you start viewing a video stream, there is no way to go back to the main menu! 

You literally have to exit the app and then go back into it. Very strange and hopefully something that’ll be fixed in future releases. The other downside is that it’s $7.99! A little expensive if you ask me.

Overall, though, the app works well and does a good job of streaming video from your webcam and the setup process was again very easy. It automatically finds the sources and lists them in the app.


JumiCam


iPad and iPhone Tips: Remotely View Webcam on iPad or iPhone Apps


JumiCam is also $4.99 and also had very good video quality, even better than AirCam. The big downside to JumiCam in my opinion is that the iPad app just displays the iPhone app window. The iPad app is not optimized for the iPad interface and therefore you see everything in the smaller iPhone-sized window. I hope they release a version soon that takes advantage of the extra real estate on the iPad.

iPad and iPhone Tips: Remotely View Webcam on iPad or iPhone Apps

The other big downside to JumiCam is that it only has software that will run on Windows and not Mac. AirCam and iCam have both Windows and Mac software. The last downside is that you can only use it with webcams attached to your computer not IP cameras. However, for me it worked because I was only using built-in webcams on Windows machines. 

The quality of the video is where JumiCam stands out. Apparently, they wrote their own optimization algorithms and that’s why the quality is good. I would have preferred JumiCam over AirCam if only they had an optimized iPad version since the price is a lot better.So those are three apps you can use to wireless stream your webcam to your iPhone or iPad. If you have used a different app or software or have issues setting these up, post a comment. Enjoy!


"Remotely View Webcam on iPad or iPhone Apps"


Reference : online-tech-tips.com


iPhone Tips: You Really Need to Buy an iPhone See few points

If you’re someone who is still using a “dumbphone as it’s called, then you might be considering either replacing it or getting an additional phone that is a smartphone like the new iPhone 5 coming out soon. Why? Well, there are a ton of reasons. But first, I want to go through the reasons why people still using dumb phones.

Of all the people I know, there are only a couple of people who carry non-smartphones. I asked them why and basically the reasons could be broken down into a few points:

1. They don’t want to be contacted anytime by anyone. They prefer to turn off their phones and use it only when needed.

2. They don’t use email and don’t understand what an app is. They also don’t understand finger swiping and touch screens.

3. Browse the Internet? Why browse the Internet when I can read a book and watch the nightly news and favorite TV shows every week at the same time?

4. Why pay lots in monthly data fees when I use my phone for calls only?If you’re one of those people, I completely understand the lack of interest in a smartphone.

Not using any apps makes pretty much any smartphone about 70% less useful. No email? Another 10% less useful. So is there really any reason for someone like this to buy a smartphone? Maybe not,

iPhone Tips: You Really Need to Buy an iPhone See few points


Firstly, it’s worth making the point that unless you actually start using something, you really can’t be certain how much you’ll end up using it. For example, my brother had a regular phone until the age of 30 and was always against getting an iPhone because it was “hyped” and he didn’t want to follow the bandwagon. He used his computer a lot for tracking stocks and kept notecards in his pocket to jot down tasks and thoughts!

He eventually got an iPhone as a gift and it changed his life literally! He uses the thing constantly and readily admits that it has made him a hundred times more productive. Now that being said, we bought my mom an Android phone and she used it for 2 weeks and then returned it because she wasn’t using any data or apps, but was forced to pay for a data plan. She ended up getting a regular phone again. My brother was a lot younger and that could have helped in his getting over the learning curve much faster.

But there is a middle ground solution that I have found works great for people who don’t feel they need smartphones, but maybe want to get some of the benefits of touch screens, bigger screens, apps, etc. Instead of getting an iPhone, you can buy an iPod Touch and get everything that the iPhone has except for the ability to make phone calls and the ability to connect to a 3G or 4G network.

I have found that this reduces the cost significantly since you don’t have to pay for the extra data plan and you still get all the benefits that the iPod Touch provides. It also lets the person learn how to use a smartphone-type device slowly without all the extra costs.Unless you travel a lot, finding a good Wifi connection is a piece of cake these days and rarely do I ever need to use the 3G/4G connection to do something.

iPhone Tips: You Really Need to Buy an iPhone See few points

I quickly realized this was the best thing for my parents. They had phones for making calls already and getting them an iPod Touch let them connect with the rest of the family who have a combination of iPhones and iPads. So what are the benefits to getting an iPod Touch?

1. You can FaceTime with any Mac, iPad or iPhone, so if your friends and family have them, then it’s perfect for video calling.

2. iMessage lets you send text messages for free to iPhones, iPads and Macs. Also, you can download WhatsApp messenger and SMS to other devices like BlackBerrys all for free.

3. The camera is pretty awesome and lets you capture pictures and videos you could never get with a regular phone.

4. Even though it does not have a built-in GPS, the iPod Touch can still find your location very accurately using Wifi connections. That means you can still use it for directions and maps.

5. Browse the web on the iPod Touch. Even if you don’t use the Internet that much, having the option is still a good thing since pretty much everything has some manifestation online too.

6. Unless you are really out of the modern world, you probably have a personal email or at least a corporate email account. Even if you just receive emails like discount coupons or Facebook notifications, it’s nice to have it available.

Of course, you can do lots more with an iPod Touch than listed above, but it all depends on the comfort level of the user. My main point is that you only need an iPhone for the following reasons:

1. You have the extra cash to pay for a monthly data plan that you will actually use.

2. You know how to use a smartphone way more than the basic level, i.e. tapping to open apps, navigating around by swiping, etc.

3. You need the ability to use apps, email, text messaging, etc while not connected to a Wifi network.

That’s about it! If you don’t have the extra cash for monthly fees and you can live off Wifi, go for something like the iPod Touch. If you only know how to use a smartphone at a basic level and will never use the more advanced features mentioned above, then you probably don’t need either and a regular phone would work just fine. What’s your take? Need one or not.


"iPhone Tips: You Really Need to Buy an iPhone See few points"


Reference : online-tech-tips.com


iPhone and iPad tips: Get Most Out of Your iPad,apps and setting

When the iPad first came out, I waited a year until they released the second version. I figured the 1st generation model would have issues that would mostly be fixed by the next iteration. So far, the iPad has been an awesome tool that I use pretty much everyday. However, it has not always been that way.

Like most people, I got the iPad and the first thing I started doing was installing apps and setting up my email, etc, etc. I used it heavily for the first few months, but then things slowly started to decline. I wasn’t sure why, but I was using my iPad a lot less! I decided to sit down and really take a look at what I needed the iPad for and what was useless.

I spent about 2 days on this project and after that I found myself using the iPad a lot more again. It was quite surprising and something I hadn’t expected. So in this article, I’ll give you some tips and pointers to maximize the potential of your awesome iPad!

iPhone and iPad tips: Get Most Out of Your iPad,apps and setting


Step 1 – App Cleanup

The first thing I did was go through a 7 pages of apps I had downloaded over the last year and removed all the useless ones and I mean really get rid of the apps I opened maybe once or twice. Don’t worry because even if you paid for an app, you can re-download any app again from iCloud later on.

On my iPad, I went from about 150 apps to about 55! That’s a lot of apps. So what’s the point of doing this? Well, I noticed that sometimes I would pick up my iPad and flip through the pages to find something to do. 80% of the time, I browsed and then just put it back down. The reason? Too many apps I really didn’t care about kept distracting me from the apps I actually use.

Also, just having that many options made my decision to pick something harder. With a lot fewer choices, I now pick something much faster and actually use the app rather than it just sitting there for months and months.

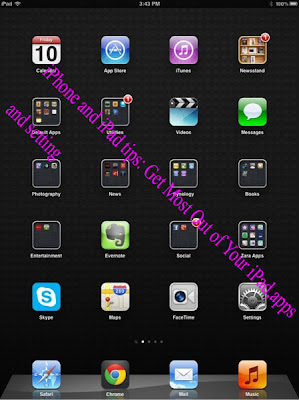
The second thing with app cleanup is organizing your apps into folders and putting those folders on the 1st page. Here’s what my home screen looks like:

iPhone and iPad tips: Get Most Out of Your iPad,apps and setting

I use the calendar, so it’s there. iTunes and App Store come in handy for buying and updating apps. Newsstand has all my magazines like Time, Reader’s Digest, etc. Default apps are all in one folder since I don’t use those that often. Then I have other stuff that I use routinely like Evernote, Skype, FaceTime, Maps, Videos, etc. Basically, 80% of the stuff that I actually use on the iPad is on the home screen now. Before the apps were all over the place and I had so many pages because I didn’t use folders to organize them properly. It’s just like keeping your computer organized, makes you want to use it more.


Step 2 – Find the Right Apps

Another thing I realized is that a lot of people could use their iPads to do things that they currently do on their computer, but they just have no clue. For example, my father checks his stocks and retirement accounts regularly, but didn’t realize that all the financial companies have iPad apps that he could use to view, manage, and even trade!

Another great example is my NAS (Network Attached Storage) device that I have at home. It’s a Synology NAS those guys are awesome because they have a couple of iPhone and iPad apps that let me stream music from my NAS to my device, play videos, download torrents, and all kinds of other cool stuff. If you didn’t know that app existed, you would be missing out on a lot of neat uses for you iPad.

Another example is if you are a paying cable customer. Using your login credentials as proof, you can watch live TV or stream movies, TV shows and lots more from apps like CNN, NBC, TNT, TBS, etc. The point is do your research on apps and you could find yourself doing everything on the iPad!


Step 3 – Get a Stand

The title may sound silly, but I have seriously started using my iPad a ton more once I got a stand for it. I’m not talking about a case that protects it, but a stand. The stands basically keep my iPad vertical rather than flat on a table all the time.

Secondly, having a stand saves my arms and actually keeps me using the iPad longer. Before, I used to just hold it in my hand, but after a while, I would get tired and just put it down. After a point, if someone called on FaceTime, I purposely would not pick up because it was such a paint to hold it for half an hour!

I solved these problems with two stands. These may or may not work for you, but they get the job done for me while laying in bed, while at my desk, while traveling, etc. The first is the Book Arc. It’s perfect for FaceTime because you can’t tilt it slightly upwards and downwards.

http://twelvesouth.com/products/bookarc_ipad/

iPhone and iPad tips: Get Most Out of Your iPad,apps and setting

I use this thing all the time. And it’s great to watch a movie when sitting on my desk or anywhere in the house using the stand. The second stand that I use is the Flex Versatility Fit.

http://www.amazon.com/gp/product/B008GZ8KMG

iPhone and iPad tips: Get Most Out of Your iPad,apps and setting

I basically use the tripod and not the rest of the stuff. That tripod is simply awesome and you can use it anywhere. It’s especially useful when you are laying in bed and need something to hold the iPad while it sits on top of covers and blankets. This thing works amazing well. You’ll see a world of difference once you get a proper stand for you iPad.


Step 4 – Get More Apple Products

The other thing that really started getting me to use the iPad more was having other Apple products. During my time with the iPad, I bought a MacBook Pro, an iPhone and and Apple TV. My wife also got an iPhone, my brother an iPhone, my sister an iPhone and an iPad and my parents an iPad.

Now things started getting interesting. Between my own devices, it was nice to be able to take a picture on the iPhone and have it automatically appear on my iPad and MacBook Pro. It was also nice cool that I could setup the same iCloud account on my wife’s phone and anything she took also showed up automatically using Photostream. We then enabled it for my sister and parents. Now everyone could see the pictures taken by everyone else.

Not something everyone would probably want to do, but it works well for us. Secondly, it’s a lot of fun to Air Play anything on my iPhone or iPad to my HDTV at home. And with Mountain Lion, I could even Air Play anything on my MacBook Pro to the TV too.

But there are other things that make having more Apple products useful. For example, I use the Chrome browser on my Windows machine and I also have it installed on my iPhone, iPad and MacBook. Now when I open a tab on any device, it automatically shows up in Chrome on all the other devices. It’s just convenient, especially if I have to leave home and happen to be browsing a web page.

There are also lots of other benefits to having more than one Apple device and it becomes readily apparent once you start using them. If you are into games, there are a ton of multiplayer games you can play over Wifi. I’ve been whipped many times in Scrabble playing against my wife over Wifi on our iPhones.


Step 5 – Accessories

The last thing that really got me using the iPad a lot was the accessories! I quickly realized that I used the iPad a lot to read emails, but never really responded because it took too long to type. Instead, I would go to the computer and do the writing there.

But then, the Logitech Ultrathin Bluetooth Keyboard Cover came along and I snapped one of those bad boys up in a second!

iPhone and iPad tips: Get Most Out of Your iPad,apps and setting

http://www.logitech.com/en-us/tablet-accessories/ipad/ultrathin-keyboard-cover

It’s super sleek like the iPad and it works wonderfully. I understand some people say to just buy a computer or ultrabook instead of trying to turn your iPad into a computer, but it’s really not that. The keyboard just lets me type faster, it’s not about getting all the functionality of a computer. It’s way more convenient to use the iPad than it is for me to go use my 4 lb laptop. Plus, I enjoy the touch interface and how much better the apps look on the iPad than on a webpage.

The second useful accessory I bought was a stylus. It’s not something everyone needs, but it’s useful if you like to draw or write by hand. There are quite a few apps out there that work very well with a stylus and make the experience a lot more immersive.

Hopefully, these tips will help you get the most out of your iPad and make it worth all that cash you used to buy it! What are your tips? Post a comment here and let us know. 


"iPhone and iPad tips: Get Most Out of YouriPad,apps and setting"


Reference : online-tech-tips.com


iPad-iPhone and computer Tips: Control iTunes,Spotify,Windows Media Center using Gestures

If you have a tablet such as a Google Nexus or Apple iPad, you of course use gestures to control the music player apps for those particular devices via touchscreen. However, if you use a standard notebook or desktop computer to listen to music and watch videos, then you likely do not have any gesture support, with the exception of MacBooks and some PC notebooks that have gesture based trackpads.

iPad-iPhone and computer Tips: Control iTunes,Spotify,Windows Media Center using Gestures

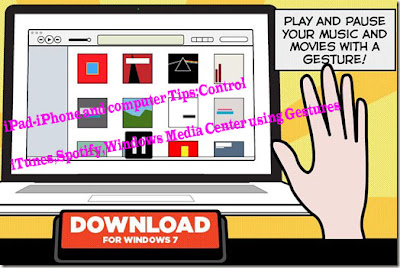
For any computer that has a webcam, you can now control the popular music apps listed above, as well as your digitally stored movies, using a free app.

The app that enables gesture based media control is called Flutter. Before you get started downloading the software, let’s quickly review how it works and how you can use it.

The app is available for both Mac and PC and is compatible with popular media playback software iTunes, Spotify, WinAmp and Windows Media Player.

iPad-iPhone and computer Tips: Control iTunes,Spotify,Windows Media Center using Gestures

Additionally, the app does not require a touch screen computer (as noted above), because it uses webcam technology to track hand movements. Here’s an example:

iPad-iPhone and computer Tips: Control iTunes,Spotify,Windows Media Center using Gestures

To get started, jump to the Flutter homepage and download the according version for your operating system. Also, make sure that your webcam is connected (if not built-in) and that it is enabled.

Once the download is complete, double-click the Flutter installer to begin installing the app.

iPad-iPhone and computer Tips: Control iTunes,Spotify,Windows Media Center using Gestures

Once installation is complete, you will be presented with the Flutter icon on your computer’s desktop. Double click the icon to start using Flutter immediately. The application will initially detect your computer’s webcam and provide you with some simple steps on how to use the program.

Finally, you can simply launch any of the supported media playback apps, such as iTunes, and try out the play and pause gestures for yourself.

Overall, the software is very basic as it only currently supports a limited amount of gestures. However, the Flutter app is a newer, recently released app so in time, it will very likely have more gestures added to it via updates. Thank you for stopping by the site for today’s post. If any of our site visitors know of any similar apps that add gestures via webcam support, feel free to link to them in the comments section. 


"iPad-iPhone and computer Tips: Control iTunes,Spotify,Windows Media Center using Gestures"


Reference : online-tech-tips.com


iPhone or iPad Tips: When to Shutdown an iPhone or iPad


Devices like the iPhone and iPad are not anything like a running PC or MacThe components are completely different and the way the devices work cannot be compared. Therefore, you can’t just apply the same rules for shutting down a computer to an iPhone or iPad.

iPhone or iPad Tips: When to Shutdown an iPhone or iPad

For iPhones and iPads, the only real reason you would ever need to shut it down completely is if the device is not working properly and if you want better battery life. If your apps are freezing or not opening properly, etc, then it’s probably a good idea to do a full shutdown and reboot. An Apple Genius employee told me that turning off the iPhone or iPad at night will help extend the life of the battery. Why? Because most people keep their phones connected to the charger all night and that doesn’t help the battery.

Otherwise, you can pretty much leave them on the whole time. The iPhone and iPad have short sleep times and therefore don’t stay on for terribly long anyway. The sleep setting will also lower the power usage of the device.

The only other time I could think of that you would want to shutdown is if you wanted to really conserve batter power. Maybe you got stuck somewhere and you only have 15% battery life left. Even on the sleep setting, the battery will be used. So you can turn off the device to converse battery power.

iPhone or iPad Tips: When to Shutdown an iPhone or iPad

For iPhones and iPads, if you just want to conserve battery, you can also put the device into Airplane mode, which turns off the WiFi radio and 3G/4G. In terms of extending the life of the flash storage, it’s probably better to keep the iPhone or iPad on as long as you can. Since it’s using flash storage, the more writes to the drive, the shorter the life. Turning your device on and off probably performs extra reads and writes to the storage, so just leave it on unless the OS starts acting funny.

The optimal configuration is probably to turn if off once at night unless you need it for important calls/emails (to extend the battery life) and that’s it. It will take a lot of on/off to really reduce the life of the storage, but the battery will definitely lose it’s luster faster so shutting down could help. Again, though, since people tend to use their phones at night also for messages, email, etc, turning off is not a big deal if it’s inconvenient.

Conclusion

As you can see, there were a lot of If this, then do that, else… in this post. For each specific person, shutting down depends on what you value more. As a general rule, if you do want to shut down, do no more than once a day. 

And doing so once a day will not damage your PC, Mac or any other device.If you’re not using your device or computer for anything at night, it is better to shut down. It will extend the life of a PC/Mac and let your iPhone or iPad battery last longer. This is a hot debate topic, so what are your thoughts on shutting down every night?


"iPhone or iPad Tips: When to Shutdown an iPhone or iPad"


Reference : online-tech-tips.com


iPhone-iPad Tips: Best Note Taking Apps for iPad 2 and Retina


I recently bought my dad the new iPad and I told him about a few of the note-taking apps that I use to keep track of everything from grocery lists to fantastical additions to our home. The  iPad2 and new iPad are great devices for taking notes either by hand or by typing. Some apps are great for hand-written notes while others are great for simple text and audio. 

If you need your notes on multiple devices or in the cloud, then again, some apps are better-suited for those needs.

In this article, I’ll go through four great note-taking apps for the iPad that should cover just about anyone’s needs in terms of note-taking ability. Some apps also support the new retina display on the new iPad and offer exceptional resolution for clear and super crisp text.

Evernote

iPhone-iPad Tips: Best Note Taking Apps for iPad 2 and Retina


Evernote has been one of my favorite apps for note-taking because it syncs with everything. It’s definitely not as feature rich as some of the other note-taking apps I’ll mention below, but it does a great job of making sure you can access your notes from anywhere including an iPhone, Mac, or from the 

Internet. You can record audio and you can create multiple notebooks, add tag and add pictures to your notes.In terms of features I would like to see in the app, it would be nice if you could add video and also if you could handwrite text into the app. Currently, it only supports typing text using the iPad keyboard. I find this to be a big downside to the app as it’s made for a tablet and there are lots of people who like to use either their fingers or some sort of stylus to input text. 

Luckily, though, this is kind of taken care of if you also download and install my second favorite note-taking app, Penultimate.

Penultimate

iPhone-iPad Tips: Best Note Taking Apps for iPad 2 and Retina


Penultimate has all of the features you would want in a note-taking app like support for the retina display iPad, paper styles, ink styles, notebook organization, etc. That’s all great and what you would expect from a paid iPad app, but what really makes the app useful is it’s integration with Evernote and Dropbox .You can quickly send your entire notebook to Evernote while keeping the formatting. You can then access those notes from anywhere since Evernote syncs to basically every operating system and the Internet.

So if you want to create more unique and eye-catching notes than is possible in Evernote, but still have get all the benefits of the cloud access, then having both of these apps on your iPad is the best solution. You can 
also specify which notebook the Penultimate notes get sent to, so you can keep those separately.

Pages


iPhone-iPad Tips: Best Note Taking Apps for iPad 2 and Retina

Even though I don’t use Pages as much as I use Evernote and Penultimate for simple notes, I do end up using Pages for more detailed on in-depth notes. For example, I went to a course on iPhone programming a while back and I found that Evernote and Penultimate were not suited for that type of in-class note taking, at least note for me. Pages is more of a word processor, but also good for notes.

It’s also easy to create charts and graphs, which you really can’t do in the other apps. If you also want things like footnotes and endnotes, word counts, saving to Microsoft Office format, etc, then Pages is definitely the better option. Pages also supports the new retina display.

Notability

iPhone-iPad Tips: Best Note Taking Apps for iPad 2 and Retina

Notability probably has a few more features than Penultimate, but I ranked Penultimate higher because of it’s integration with Drop box and EvernoteNotability also has integration with Drop box, plus a couple of other services like Box.net and iDisk, but I find that syncing to Evernote is a better option.

In terms of other features, Notability lets you handwrite, but also has other common word processing tools like styling, bullets, bold, italic, etc that come in handy. Another nice feature of Notability is that you can record audio and then type or write in your notebook. When you play it back, you can see the text that you had typed in while the audio recording was being made.

What is your favorite note-taking app for the iPad? Let us know in the comments.


"iPhone-iPad Tips: Best Note Taking Apps for iPad 2 and Retina"


Reference : online-tech-tips.com


Computer Tips: Shared vs VPS Hosting

When searching for a quality web host for your website, email or company infrastructure, you will likely need to select a type of hosting plan. Among the most common types of hosting are shared, dedicated, VPS and cloud. Each of these hosting methods have their pros and cons, so it’s wise to select the proper hosting plan for your particular website or deployment.

Computer Tips: Shared vs VPS Hosting

Did you know: A power website like Facebook is estimated to have approximately 60,000 servers. A basic shared hosting plan, which the majority of websites run on, includes one server that provides hosting for many websites.

Using the following, basic web hosting guide, you can learn more about how the popular web hosting options work, and hopefully choose a great hosting option for your particular website or hosting needs.

Shared Hosting

Computer Tips: Shared vs VPS Hosting

Shared hosting plans are among the most popular of all web hosting options, due to affordability and price. Most web hosts offer basic shared plans starting around $5.00 USD a month, give or take.

Shared hosting plans

With a shared hosting plan, your website, email or other deployment is hosted on a server that is shared by others who have similar shared hosting plans. This allows hosting companies to offer shared hosting for cheap prices, as these hosting plans do not require their own dedicated machine per customer. Multiple shared hosting plans can be deployed from a single server and even a single instance.

Additionally, this hosting option requires the least amount of core maintenance, as most hosts may assign a unique or rotating administrator to their customers with shared hosting plans. This administrator not only keeps the system up-to-date, but also provides routine, admin level root maintenance tasks.

Shared hosting plans are not necessarily slower than VPS or cloud hosting plans, although most shared plans are not as fast as dedicated servers. Much of the speed of a shared hosting plan is determined by the other shared plans that are hosted on a particular server.

For example, if you purchase a shared hosting plan for your blog, your blog will obviously be hosted alongside several other websites, blogs or deployments on the same server. If another shared website on your server gets a traffic spike or high amount of website visits, than the distribution of server speed may effect the other shared plans on the particular server. Thus, your website may become slower.

What are the advantages of shared hosting?

Cheap
Managed by an Administrator
Unlimited bandwidth
Unlimited storage
Simple to use, learn and operate

What are the disadvantages of shared hosting?

A- Managed by an Administrator
B- Limited speed
C- Not great for websites or deployments that get a lot of traffic
D- Less security than other options because deployment is stored on the same server in the same hosting manager as other shared hosting customers. If someone gains access to the root level hosting of a hosting manager, they have access to all shared plans that are deployed from that instance.

Who should use shared hosting plans?

Low to medium traffic websites and blogs are ideal for shared hosting plans, along with websites that have few webpages, or portfolios, etc…

VPS Hosting

Computer Tips: Shared vs VPS Hosting


VPS, or virtual private server hosting plans are considered to be a step up from shared plans, but not as advanced as dedicated servers. Most web hosts offer VPS plans ranging from $25.00 USD per month to $250.00 USD per month, give or take.

VPS hosting plans

With a VPS hosting plan, your website may not necessarily have its own unique machine/server. However, you still retain many of the benefits of having a unique machine/server, because most VPS plans are deployed via virtual machines.

With a shared hosting plan, mentioned above, you share a server with other shared hosting plans and are managed by an administrator. With a VPS hosting plan, you may share a machine/server with others, but your deployment is unique and you are for the most part, the administrator.

Consider it like this, you may run VMware or Parallels on your personal computer so that you can deploy other operating systems. A VPS hosting plan is similar. A computer or server utilizing VPS may have virtualization software installed, in which you are assigned your own deployment, or your own virtual machine or host manager software.

This lets you manage more aspects of your deployment, and most hosting providers also allow VPS users root access and management.

However, because one machine/server may be host to several VMs (virtual machines), VPS hosting, in a way, is shared hosting.

What are the advantages of VPS hosting?

Offers most features of a dedicated server, at a reduced price.
Managed by you, but many VPS hosting providers offer assistance and support for VPS customers.
Scalable to different plans, for increased or decreased usage or website traffic.
Usually more assigned speed with set server specs. VPS plans give you a defined amount of CPU, RAM, Disk space and bandwidth.
What are the disadvantages of VPS hosting?

Managed by you or your administrator. More complex and greater learning curve than shared hosting.

Shared on server.
Limited bandwidth.
Limited storage.
Limited resources.

Who should use VPS hosting?

Many low traffic websites and mid traffic websites alike use VPS hosting. It’s significantly more affordable than a dedicated server, while still providing root level access and self administration. However, it’s not as powerful as a dedicated server, because it’s a shared server deployment.

Thank you for stopping by the site for today’s post. I hope that for anyone new to web servers and hosting, you may have learned more about how shared and VPS hosting works. Be sure to stop by the site for our next post, where we will cover cloud hosting, dedicated hosting and some other details regarding web hosts.


"Computer Tips: Shared vs VPS Hosting"


Reference : online-tech-tips.com


iPhone-iPad Tips: Remotely Access PC or Mac from Smartphone or Tablet


Being able to access the files on your PC or Mac from your smartphone is ultra convenient, as you likely store significantly more files and data on your computer, than you do your phone. Your computer is likely the main hub for your photos, videos, media, business data and more.

iPhone-iPad Tips: Remotely Access PC or Mac from  Smartphone or Tablet

One of the more popular ways to access files on a computer, from a smartphone or tablet, is to simply use cloud services. If you’re looking for a cloud service, jump to our article on the best cloud services.However, if you’re on the go and need to access an important file on your computer, cloud services require that the particular file be stored in a specified cloud backup folder. For example, with Dropbox, this would be the 
Dropbox folder. If you’ve forgotten to copy the file to your cloud folder, then it won’t be accessible from your smartphone or tablet.

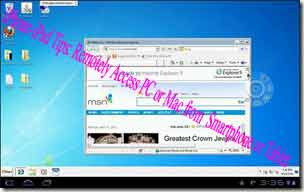
In today’s post, we will review how you can actually gain full access to your PC or Mac, including being able to access files, run applications and more, directly from a smartphone or tablet.

Android Smartphones and Tablets

Remote Desktop by Kolakowski Damian (Free)

This free remote desktop app works by pairing your smartphone with your computer via web browser (Chrome or Firefox). Its unique interface also allows for smoother, more responsive navigation from a smartphone or tablet.

iPhone-iPad Tips: Remotely Access PC or Mac from  Smartphone or Tablet

Pocket Cloud Remote Desktop Pro is a premium remote desktop client that boasts nearly perfect Google Play ratings from users. Aside from basic desktop access, the app is also fine tuned for touchscreen navigation. Unique features like the navigation wheel allow you to navigate your desktop more effectively from touch screen devices.

iPhone-iPad Tips: Remotely Access PC or Mac from  Smartphone or Tablet

Team Viewer Free Edition (Free)

Team Viewer Free Edition is one of the more popular remote desktop apps in Google Play. Using the Team Viewer exclusive client interface, you simply download the app to your device, download the app to your computer, and you’re set to go.


"iPhone-iPad Tips: Remotely Access PC or Mac from  Smartphone or Tablet"


Reference : online-tech-tips.com



iPhone-iPad Tips: Sync Facebook Friends with iPhone Contacts


In the process of cleaning up my contacts on my iPhone, I realized that I had a lot of overlap between my iPhone contacts and my Facebook friends, but no connection between the two. I remember reading previously on the Facebook blog that there was some way to “sync” your Facebook friends with your iPhone contacts so I started digging through the app on my phone.

I finally found what I was looking for and was able to add Facebook profile pics and Facebook profile links to my iPhone contacts automatically using the syncing feature. In this article, I’ll quickly show you how to setup syncing of your Facebook friends down to your iPhone.

To start off, make sure you go to the App Store on your iPhone and download the latest version of the Facebook app. The process has changed quite a bit over the last year or so since they redesigned the app. Once you have the latest version, open the app and it’ll probably load the News Feed like shown below:

iPhone-iPad Tips:  Sync Facebook Friends with iPhone Contacts

Go ahead and click on the navigation button at the top left. It’s basically a button with three horizontal lines on it. That will bring up the left-hand pane where you can navigate to other parts of the app.

iPhone-iPad Tips:  Sync Facebook Friends with iPhone Contacts

Now go ahead and tap on Friends to see your list of friends.

iPhone-iPad Tips:  Sync Facebook Friends with iPhone Contacts

Now go ahead and click on the small little button at the top-right that has a box with a curvy arrow coming out of it.

iPhone-iPad Tips:  Sync Facebook Friends with iPhone Contacts

You’ll see two options pop up at the bottom: Find Friends and Sync Contacts. Go ahead and click on Sync Contacts.

iPhone-iPad Tips:  Sync Facebook Friends with iPhone Contacts

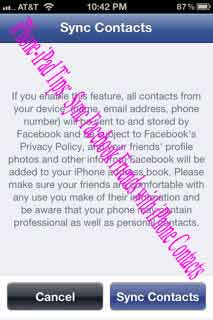
Now tap on the toggle button to turn on Syncing. This will go ahead and add profile pics and links to your iPhone contacts. You can also choose to replace existing photos in your contacts . This basically means if you already had a picture for a contact, it will be replaced by the user’s Facebook profile pic. Now when you toggle it on, you’ll get a message like this from Facebook:

iPhone-iPad Tips:  Sync Facebook Friends with iPhone Contacts

Read it! Basically, it says all your contact info is going to be uploaded to Facebook and probably stored on their servers forever. And it takes all the info about that contact too. So if you don’t mind sharing that data with Facebook, then go for it, otherwise syncing may not be such a good idea. 

And that’s pretty much it! Friends and contacts with the same name should automatically be linked up and you should see their profile pic along with a link to their profile page in the contact info. Enjoy!


"iPhone-iPad Tips:  Sync Facebook Friends with iPhone Contacts"


Reference : online-tech-tips.com