Computer Printer Tips: Guide to Troubleshooting Printer Problems

Printer problems can be extremely annoying and frustrating. One of my friends just posted a status that sums it up pretty well, “We can send someone to space, robots to Mars, but I still can’t print a Word document!”. I’m pretty amazed myself how many problems I have with printers, especially wireless ones.

Over the years, printers have gotten cheaper and better in quality, but are terrible in terms of ease of use. HP routinely includes driver CDs with their printers that are several hundred MBs in size. Really? Does my printer really need software that is equal in size to Microsoft Office? I don’t think so.

They also have complicated setup routines and require all kinds of steps to install that are just plain hard for most consumers. I spent a good hour setting up my wireless printer and I’m a tech geek. My mother could never install a wireless printer and that’s just plain sad. Printers shouldn’t be so hard to use! In this article, I’m going to try and guide you through the common ways to solve a lot of printer problems.

Computer Printer Tips: Guide to Troubleshooting Printer Problems

Restart, Restart, Restart

I can’t tell you how many times I’ve had printer issues and just restarted everything and then was able to print fine. In my case, I restart the computer, restart the printer and restart the router if your printer is connected wirelessly or via Ethernet cable. I keep my computer on all the time and for whatever odd reason, I sometimes have to restart the computer in order to reconnect to the printer properly.

If your printer is a networked printer, then it’s definitely key to restart the router. I have an AT&T router and I have to constantly restart it because it just freezes up a lot. It’s stuck inside a wall and therefore heats up a lot. When it overheats, the Internet connection dies and the performance over the network becomes very bad. Restarting it definitely helps and usually fixes the printing issue.


Cables & Connections

The second thing you always want to make sure is that the connections are all correct. You never know when that USB attached printer got pushed by your 2-year old and slightly disconnected. Anytime I have a USB printer attached to a computer and I can’t print, I check the cables first to make sure it’s plugged into the printer and computer port properly.

For wireless printers, you want to make sure that your printer has a valid IP address. You should print the network TCP/IP page from your printer and check that the IP address is not 169.254.xxx.xxx because if it is, that means it’s connected getting an IP address from the wireless router.

Computer Printer Tips: Guide to Troubleshooting Printer Problems

If you printer has become disconnected from the wireless network, you will need to connect it back. You can sometimes do this from the printer itself or you have to run the CD or download the wireless setup utility from the manufacturers website. I have done a little research and found some of the guides to a few of the big printer companies that show you how to reconfigure the printer so that it’s connected to the network again. Note that some are for specific models, but the procedure can be followed for other wireless printers by the same company.


Note that if you ever changed the settings on your router or if your router got reset or something like that, the printer could lose the connection to the network. In these cases, you’ll have to follow the links above and add your printer back to the network.

Firewall & Anti-Virus Issues

One major source of grief is a firewall. Whether it’s the built-in one in Windows or a third-party firewall, your connection to the printer could be blocked. The best way to see if the firewall is causing a problem is just to disable it and then try to print. If you can print, you know it was a firewall issue and then you can see what exceptions you need to add.

Computer Printer Tips: Guide to Troubleshooting Printer Problems

The other major source of grief is over zealous anti-virus software. When I used to work in a corporate environment and we first installed Symantec, it took a few days for the IT admins to fix all the settings so that we could print properly! If you recently installed some new anti-virus or Internet protection, etc, etc type software on your computer, try disabling it and do a test print.

Windows Issues
Print Spooler

Next up are all the different issues that happen in Windows. One of the major issues is the print spooler service. It’s in every version of Windows and it’s what manages all the print jobs. If something goes wrong with the print spooler service, you’re not going to be able to print.

One problem you’ve probably seen before is when a print job refuses to delete from the print queue. The print job basically gets stuck in the print queue. In this case, you have to stop the print spooler service and delete all the jobs in the queue manually. Check out my previous post on deleting stuck print jobs.

The other issue with the Print Spooler service is that sometimes it’s not running or quits unexpectedly. There are a lot of reasons that this can happen and you can read my previous post on fixing the issue where the print spooler quits unexpectedly.


Drivers

You should also go to Device Manager and check to make sure that the printer is listed there and it doesn’t have a yellow exclamation, a question mark or a red X icon on the printer.

Computer Printer Tips: Guide to Troubleshooting Printer Problems

You can also try to uninstall the printer and reinstall it from Device Manager. Go ahead and download the latest drivers from the printer manufacturer and install them when you reinstall the printer. If a printer driver has become corrupt, reinstalling the printer drivers will fix the issue.

Printer Issues

Here are a few quick things you can check to ensure the printer if working properly:

1. Make sure the printer is on.

2. Make sure the status light is green. Most printers have some status light indicating the printer is ready to print. Make sure to download the guide for your specific printer model to check what each status light means.


Computer Printer Tips: Guide to Troubleshooting Printer Problems

3. Make sure there is paper in the printer.

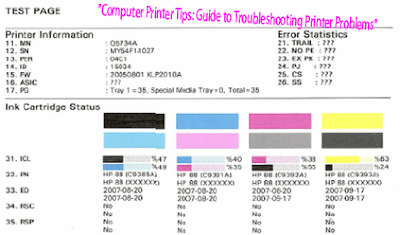
4. Make sure you can print a test page from the printer. If there is something physically wrong with the printer and it can’t print a test page, you’re not going to get it to print from your computer.

Computer Printer Tips: Guide to Troubleshooting Printer Problems

5. Make sure the printer has ink cartridges or toner and that it’s not empty. I usually only install the printer driver and not the extra software that manages the printer, so I don’t get a message on my computer when the ink is out. I have to manually check the printer and make sure there is ink or toner.

6. Is there a paper jam that you cannot see? If you tried to print envelopes or labels, they can become stuck inside and you may not necessarily see them.

7. Is the cable you are using a good cable? If you have a USB cable, check to make sure it’s not bent on either end. If you’re using an Ethernet cable, make sure the plastic ends are not broken off and the wires are properly in place.

This guide doesn’t nearly cover all the different types of printer problems you can possibly have, but hopefully it can guide you in troubleshooting most of the really common printer problems. If you can’t print from your computer and you tried just about everything, post a comment here and I’ll try to help. Enjoy!


"Computer Printer Tips: Guide to Troubleshooting Printer Problems"


Reference : online-tech-tips.com


Windows 8 Explorer Tips: Thumbnail Previews Not Showing in Windows 8 Explorer

I installed Windows 8 RTM on my home desktop a few weeks back and so far haven’t really had any problems. However, one odd thing that I noticed was that whenever I would view a directory that contained pictures or videos, I would just see the default icon for that file type rather than a thumbnail preview of the files.

So if I navigated to my Pictures library in Windows 8, I would get the photo icon for each image:
Windows 8 Explorer Tips: Thumbnail Previews Not Showing in Windows 8   Explorer

And if I viewed a directory full of videos in Windows 8, I would get the same thing, just with the default video icon:

Windows 8 Explorer Tips: Thumbnail Previews Not Showing in Windows 8   Explorer

This was getting really annoying and I realized it was doing this since the time I installed Windows 8 on the PC. I’m not sure why it’s defaulted to this view instead of thumbnail previews like it is in Windows 7, but if you want the thumbnails back in Windows Explorer, here’s how to do it.

First, open Windows Explorer and then click on Options and Change folder and search options.

Windows 8 Explorer Tips: Thumbnail Previews Not Showing in Windows 8   Explorer

Next, click on the View tab and uncheck the box that says Always show icons, never thumbnails.


Windows 8 Explorer Tips: Thumbnail Previews Not Showing in Windows 8   Explorer

Once you get rid of that checked option, you should now get thumbnails for all your pictures, videos and even documents.

Windows 8 Explorer Tips: Thumbnail Previews Not Showing in Windows 8   Explorer

There is one other place that you can adjust the setting for showing icons or thumbnails in Windows Explorer. First right-click on Computer on the desktop and choose Properties. Then click on Advanced System Settings on the left side.

Windows 8 Explorer Tips: Thumbnail Previews Not Showing in Windows 8   Explorer

This will open up the System Properties dialog. Here you need to click on the Advanced tab and then click on Settings.

Windows 8 Explorer Tips: Thumbnail Previews Not Showing in Windows 8   Explorer

Finally, make sure Show thumbnails instead of icons is checked.

Windows 8 Explorer Tips: Thumbnail Previews Not Showing in Windows 8   Explorer

With these two settings, you should now be seeing thumbnail previews for pictures, videos, documents, and other file types in Explorer on Windows 8

If you’re still seeing just icons, post a comment here and I’ll try to help. Enjoy!


"Windows 8 Explorer Tips: Thumbnail Previews Not Showing in Windows 8 Explorer"


Reference : online-tech-tips.com


Computer Tips: Multiple Web Pages Open When Your Browser Starts Up

Looking for a way to open several webpages at once when you start up your browser? I had previously written about how to set multiple home pages in IE and Firefox back in early 2008, but that post is so old that the options in the browser are not even the same anymore. Also, at that time Google Chrome was released in beta and now it’s almost the second most popular browser in the world. So time for an update!

In this article, I’ll show you how you can setup IE, Firefox, Chrome and even Opera to open multiple web pages or tabs when the browser starts up.

You can use the built-in options in the browser or you can pick from some add-on and plugins that also get the job done.

Google Chrome

Let’s start off with Chrome since I use that as my primary browser. In Chrome, you have a couple of different options, which is nice. First off, if you’re one of those people that never close your browser, then you might want to check out the Continue where I left off option. Click on the three-line button at the right, then click on Settings.

Computer Tips: Multiple Web Pages Open When Your Browser Starts Up

Under Settings, you will see On startup and a couple of radio buttons. You can either have a new tab page open, which will show you your most visited websites by default in Chrome. You can also use this radio button if you have an extension like SpeedDial2 installed, which reconfigures your new tab page.

Computer Tips: Multiple Web Pages Open When Your Browser Starts Up

If you want several tabs to open, you’ll need to choose from Continue where I left off or Open a specific page or set of pages. Continue where I left off is nice if you always keep the tabs you want to use open anyway in Chrome and don’t close Chrome. In the event of a crash or a restart, Chrome will just load back up with all the tabs you had before it shutdown. So if you like to pin tabs and that sort of thing, this might be a good alternative.

If not, you can always choose the last option and then just type in as many URLs as you like.

Computer Tips: Multiple Web Pages Open When Your Browser Starts Up

In Chrome, all your session data is saved, so you won’t have to log back into sites like Facebook or Gmail unless you configure them that way. Chrome has a setting under Advanced that let’s you delete the session data too if you like.

Firefox

In Firefox, you can use the built-in option or download from a plethora of plugins and add-ons. I personally like using the built-in option because it fits my needs, but for those who need more advanced options, I’ll mention a plugin or two you might like.

As opposed to Chrome and other browsers, in Firefox you first need to open the tabs that you want to set as your home pages. Once you have the tabs open, go ahead and click on the Firefox button and then choose Options – Options.


Computer Tips: Multiple Web Pages Open When Your Browser Starts Up

Click on the General tab and then choose Show my home page for the When Firefox starts option.

Computer Tips: Multiple Web Pages Open When Your Browser Starts Up

Now just click on the Use Current Pages button and you’re good to go! There are some add-ons that add extra functionality like opening certain links only on certain days. Morning Coffee is one that comes to mind. You can search for others too.

Internet Explorer

For IE 9, all you have to do is click on the gear icon and then click on Internet Options. Then go to the General tab.

Computer Tips: Multiple Web Pages Open When Your Browser Starts Up

Computer Tips: Multiple Web Pages Open When Your Browser Starts Up

Now just type in each URL on it’s own line and then click OK to close the Internet Options dialog. That’s about it for IE 9. What about IE 10?Well, if you are running Windows 8 with IE 10, you will be happy to know they have a few more options than previous versions of IE.

Again, go to the General tab and you can still enter multiple web pages like previously, but now you also have some other options below that.

Computer Tips: Multiple Web Pages Open When Your Browser Starts Up

You can choose Start with tabs from the last session, which is the same as Continue where I left off in Chrome. You also have more options to configure your tabs in IE 10. Click on the Tabs button and you get a whole bunch of stuff.

Computer Tips: Multiple Web Pages Open When Your Browser Starts Up

You can choose to open the new tab page when a new tab is opened or your first home page or a blank page. You can also choose to open the first home page when IE 10 starts up, but that kind of defeats the purpose of opening multiple pages when the browser loads. Note that this is for the desktop version of IE 10. For Metro IE 10, there doesn’t seem to be a way to do this yet.

Opera

Opera is a little different than the other browsers when it comes to setting up multiple home pages. First open all the pages you want to have load on startup and then click on the Opera button, click on Tabs and Windows, Sessions and then Save This Session.

Computer Tips: Multiple Web Pages Open When Your Browser Starts Up

You can then check the Show these tabs and windows every time I open Opera box.

Computer Tips: Multiple Web Pages Open When Your Browser Starts Up

You can also click on the Opera button, go to Settings and then Preferences.

Computer Tips: Multiple Web Pages Open When Your Browser Starts Up

Here you can choose from Continue from last time, continue saved sessions, Start with home page and more. Opera has a lot of options, which is kind of cool. That’s about it! If you have any questions or know of any better plug-ins or add-ons for any browser, let us know in the comments. Enjoy


"Computer Tips: Multiple Web Pages Open When Your Browser Starts Up"


Reference : online-tech-tips.com


Computer Tips: Repairing Your Own Computer Instead of GeekSquad

So I recently had a friend come over to my place and ask me if I could take a look at his computer because it suddenly started giving him an “Operating system not found” error whenever he tried to boot up. It was a fairly new laptop and it had Windows 7 Home Premium installed.


He had taken the laptop to GeekSquad and walked out the next minute when they told him it was going to cost $450 to fix the computer! He had only paid like $500 for the laptop, so there was no way he was about to pay $450 to fix the thing. Anyway, to make a long story short, I fixed the whole thing for him for $88, the cost of a new hard drive since the original one was dead. Didn’t have to pay extra for Windows 7 because he had a product key on the back side of the laptop.


Computer Tips: Repairing Your Own Computer Instead of GeekSquad

In this article, I’m going to try my best to show you how you can avoid paying hundreds of extra dollars trying to get your computer fixed by so-called “premium services” and do it yourself or at least most of it yourself! In the end, I realize that there are some people that simply do not understand how to open a computer, for example, and would need someone else to do that for them. However, you can still avoid using a expensive service like GeekSquad for that.

The Diagnosis

The first thing you get when you take a computer to GeekSquad or any other computer repair service is their diagnosis. I won’t say it’s always bad as it really depends on the technician looking at your machine. Some are really good and understand what’s going on and some will tell you the world is ending when everything is fine.

Before you just listen to whatever someone says and spend lots of money, take some time to figure out what they are saying is true. What’s great about computers is that even though they are complicated, they are not nearly as complicated as cars. When you take a car to get repaired and you know nothing about cars, there is really little you can do if they tell you your transmission is dead. You can get a second opinion, but you really can’t check the car to see if that’s true.

With computers, you can actually check. Failed hard drive? You can check that easily. Bad memory? You can check that too. Unbeatable virus that has corrupted your entire system? Yup, there are ways to check that! Luckily, that’s just about 90% of the issues that end up in the hands of the GeekSquad. What about recovering data from a drive that won’t boot up? You can spend $20 and do it yourself.

So you’re asking yourself now, “That’s great, but how do I do all of that?”. Before, I get into that, I want to go over the reasons I feel people end up going to a service like GeekSquad:


1. They simply don’t have the time to do it themselves

2. They don’t have the original DVD that came with the computer

3. The have the DVD, but don’t want to reinstall the OS because they’ll lose data they need

4. They need to replace a piece of hardware, but are apprehensive about doing it or don’t know what to replace

As far as I can tell, those are the most critical issues that force people to end up going to a repair service and paying lots of money. Luckily, there are some solutions before you shell out all that money. First off, just pay for the diagnosis and then take the computer back. I always tell people to never just accept the diagnosis and let them do the work. Instead, let them tell you what they think the problems are and what needs to be done, then go back home and check this guide!

The OTT Do-It-Yourself Guide

Even if you are unable to repair the computer yourself, you can at least figure out what’s really wrong with it. And in the cases where you don’t have to replace a hard drive or memory, you really can do it yourself. Let’s start with viruses, then hard drives, then memory. I’ll also talk about how to recover data along the way.

Computer Tips: Repairing Your Own Computer Instead of GeekSquad

Viruses

So the repair folks can tell you one of two things when it comes to viruses: either it can be removed for some crazy amount or it simply can’t be removed and you have to reinstall Windows. In the latter case, this requires transferring your data and then reinstalling the OS.

My suggestions for computer newbies is to try it yourself and then if you simply can’t do it and nothing is working, then pay the money. There is no harm in trying. Here’s what you need to do.

Step 1: 
You can try to remove the virus yourself. How so? Try to use an offline virus scanning tool. Obviously, if you are reading this post, you can’t do a real-time scan in Windows for some reason. Check out my post on performing an offline virus scan, which basically will scan for viruses before the operating system loads.

With viruses, some programs work better than others. If you can’t get rid of the virus using Window Defender Offline Tool, which I linked to above, then you can try others like BitDefender Rescue CD or Rescue USB. It’s got a full tutorial on how to download it, create the CD, etc. Of course, you’ll need to do this on a different computer first and then use the CD/USB drive on the infected PC.

Another good offline virus scanning tool is Kaspersky Rescue Disk. The site has full tutorials on how to create the disk and how to use it to remove viruses. If you can follow instructions, you can do this yourself, even if you’re not very familiar with computers.


Step 2: 
If you can’t get rid of the virus, then your only other option is to reinstall Windows. There are usually two problems with this scenario: one is you need to copy important data off and the second is that you may not have the original DVD that came with the computer.


However, both of these issues can be solved without much expense. The first is copying data off your hard drive. If you have a virus and it’s preventing you from loading Windows, the only way to get the data off is to use a hard drive dock.

Luckily, I’ve written a detailed article on what a hard drive dock is, which one to buy and how it works. It’s super easy and if you know how to plug a USB drive into your computer, you can use a hard drive dock. It will allow you to copy data off of the hard drive without loading Windows. This will require you to remove the hard drive, which may or may not be a deal breaker. In the end, I have seen that most manufacturer websites have completely guides that you can download that show you how to add or remove hardware components.

Secondly, what about the original DVD? That’s not a problem either. If you don’t have it, you can download the official and legal ISO images of the Windows OS to your computer and then burn it to a DVD. Note that these are not illegal or pirated copies, but legal copies that you have to activate with a valid product key. If you don’t have a product key, they are just 30-day trials.


http://www.mydigitallife.info/official-windows-7-sp1-iso-from-digital-river/

http://www.windows7hacker.com/index.php/2009/11/download-retail-windows-7-iso-from-official-website/

Check out the two links above for the links to download Windows 7 ISO images from DigitalRiver, which is an official Microsoft partner that you can buy Windows from. In our case, you just need the version of Windows that your computer came with and then you’ll install Windows and use the product key that is on the back of your computer.


You can also read my previous posts on how to burn an ISO image on a Mac or how to burn an ISO image on a PC. In order to reinstall Windows, you have to boot from the DVD and then follow the installation prompts. Check out my previous post on 10 essential skills for Windows users and read #10. You may
have to do a little Googling in order to reinstall Windows if you have never done it before, but it’s really not too bad if you spend a short amount of time.

Hard Drive & Memory

The other major issues are a failed hard drive or bad memory. If you get that diagnosis, then you can perform some tests on your own to validate their claims. First, let’s talk about hard drives. If your hard drive is failing or has crashed completely, then it’s bound to have errors.


You can check your hard drive for errors using a variety of free programs that I mention in the linked post. One of the tools mentioned in my article is SeaTools, which again can be downloaded as an ISO image, burned to a CD and then booted from. It may sound complicated, but if you follow the links above about burning ISO images and booting from CD/DVD, you’ll be just fine.

As for memory, you can also do the exact same thing as for checking hard drive. Check out my previous post on tools for checking for bad memory. I highly recommend Memtest86, which can be downloaded and burned to a CD. This method allows you to check your hard disk and memory without having to boot Windows, which is good in case Windows is not loading.

Lastly, if you do need to replace a hard drive or a memory chip, you need to buy the parts. Check out my post on the best places to buy computer parts online. I would highly recommend Crucial.com as it will allow you to pick your exact computer model and then tell you exactly what memory and hard drive is compatible with that system. You don’t have to worry about buying the wrong memory or the wrong hard drive.

Installation

The last part and probably the scariest part for anyone who is a newbie is installing a computer part like a hard drive or memory. If you have a laptop, I can say it’s a lot easier than a desktop. Sometimes desktops can be a little complicated because of the case and the location of the motherboard and ports, etc. If you’re having issues with a laptop though, you really can do it yourself because laptops are mostly designed to be easily upgradeable.


My main suggestion at this point is to do one of two things: either try it yourself if you feel you can possibly do it or simply hire someone local to do it. If you go to Dell.com, Sony.com, HP.com or whatever your manufacturers website is, you will be able to find a support page where you can enter your model number and download PDF guides for your PC.

 These will usually tell you how to open the computer and add/replace components.If you just can’t do it yourself, I suggest posting an ad on Craigslist or
just doing a Google Local or Yahoo Local search for a computer repair specialist in the area. Call them and tell them you just need to have them install a new piece of hardware. It really should cost nothing more than $50. It’s usually a very simple procedure, so don’t let someone try to charge you anything more than $50 max.

Conclusion

Hopefully, this guide can get you a little inspired and more confident about your ability to fix your own computer problem. It may sound and look scary, but with a little bit of time and effort, you can literally save yourself hundreds of dollars. Let us know what you think in the comments.


"Computer Tips: Repairing Your Own Computer Instead of GeekSquad"


Reference : online-tech-tips.com