This is great, but there will be cases when something goes so terribly wrong that even the automatic loading of recovery options fails. In this case, you’re out of luck unless you have a system repair disc or a system recovery USB drive. Both are essentially the same, one just is on a CD and the other is on a USB flash drive.
In this article, I’ll walk you through the steps to create a USB system recovery drive that you can boot to in case Windows 8 fails to load completely. Note that if you didn’t create the recovery drive beforehand, you can use another Windows 8 machine to create it and then use it on the broken PC.
System Recovery USB Flash Drive in Windows 8
To get started, open the Control Panel and click on Recovery. You may need to switch to the large or small icons view in order to see it like shown below:
Now go ahead and click on Create a recovery drive:
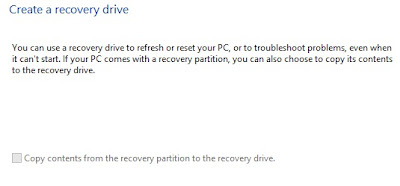
The recovery wizard will start and if your computer already has a built-in recovery partition, you’ll have the option to check the box at the bottom which will copy of the contents of the partition to your USB flash drive. If you don’t have a recovery partition, it will just be greyed out.
Click Next and it will automatically search for all available drives that you can use for the recovery drive. Choose your flash drive and click Next.
Windows will tell you that everything on the drive will be deleted, so make sure to backup any data you might need.
Now go ahead and click the Create button to start the process. Windows will copy the appropriate utilities to the flash drive.
The process takes just a couple of minutes and that’s it! You now have a bootable system recovery USB flash drive that you can use in case your copy of Windows 8 crashes and burns.
"Computer Tips: WIndows 8 tips Create Bootable System Recovery USB Drive in WIndows 8 "
Reference : online-tech-tips.com


0Awesome Comments!